
The SalesReady template builder is built on GrapesJS, which is a drag-and-drop builder that uses modern web design to create visually appealing templates. You can access their playground if you would like to try it out beforehand - https://app.grapesjs.com/studio.
Here are the steps to create a template:
-
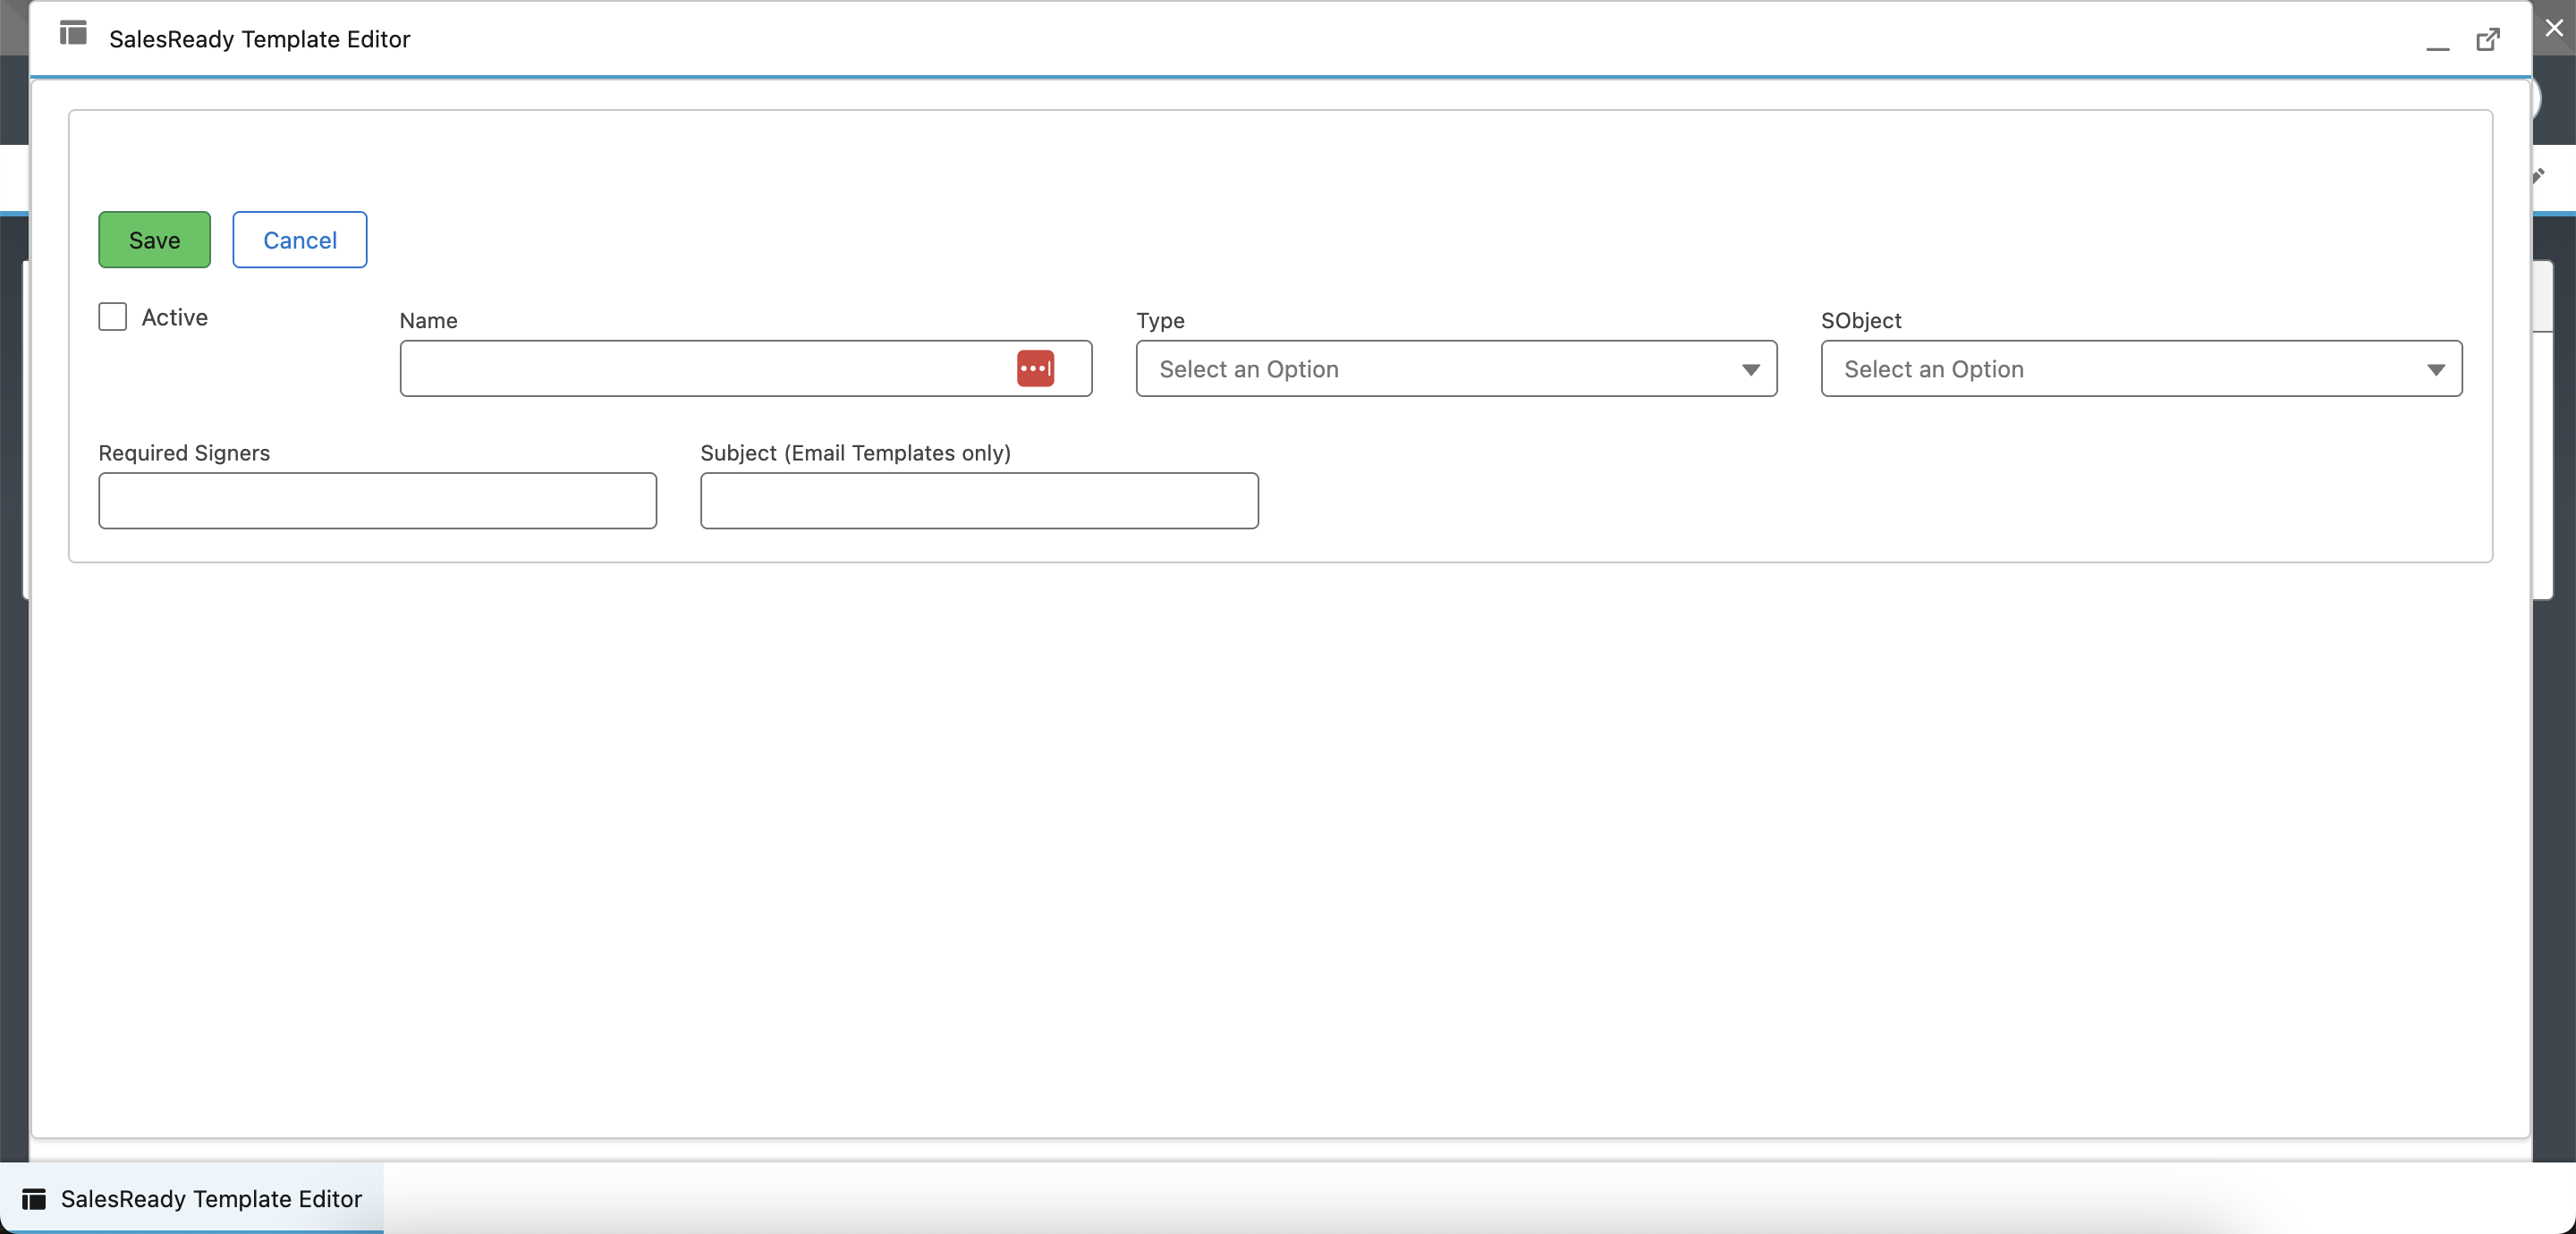
Open the template builder.
-
Mark as Active when ready to make it live to end users. Uncheck to make it inactive.
-
Type can be Document or Email.
-
SObject can be any object in the system. Documents are grouped by object, and selectable when opening the universal transaction container.
-
Required Signers is needed if sending for signature and at least one signer must be added beforehand.
-
Subject is only applicable if the template is an email.
-
-
Save the template.
-
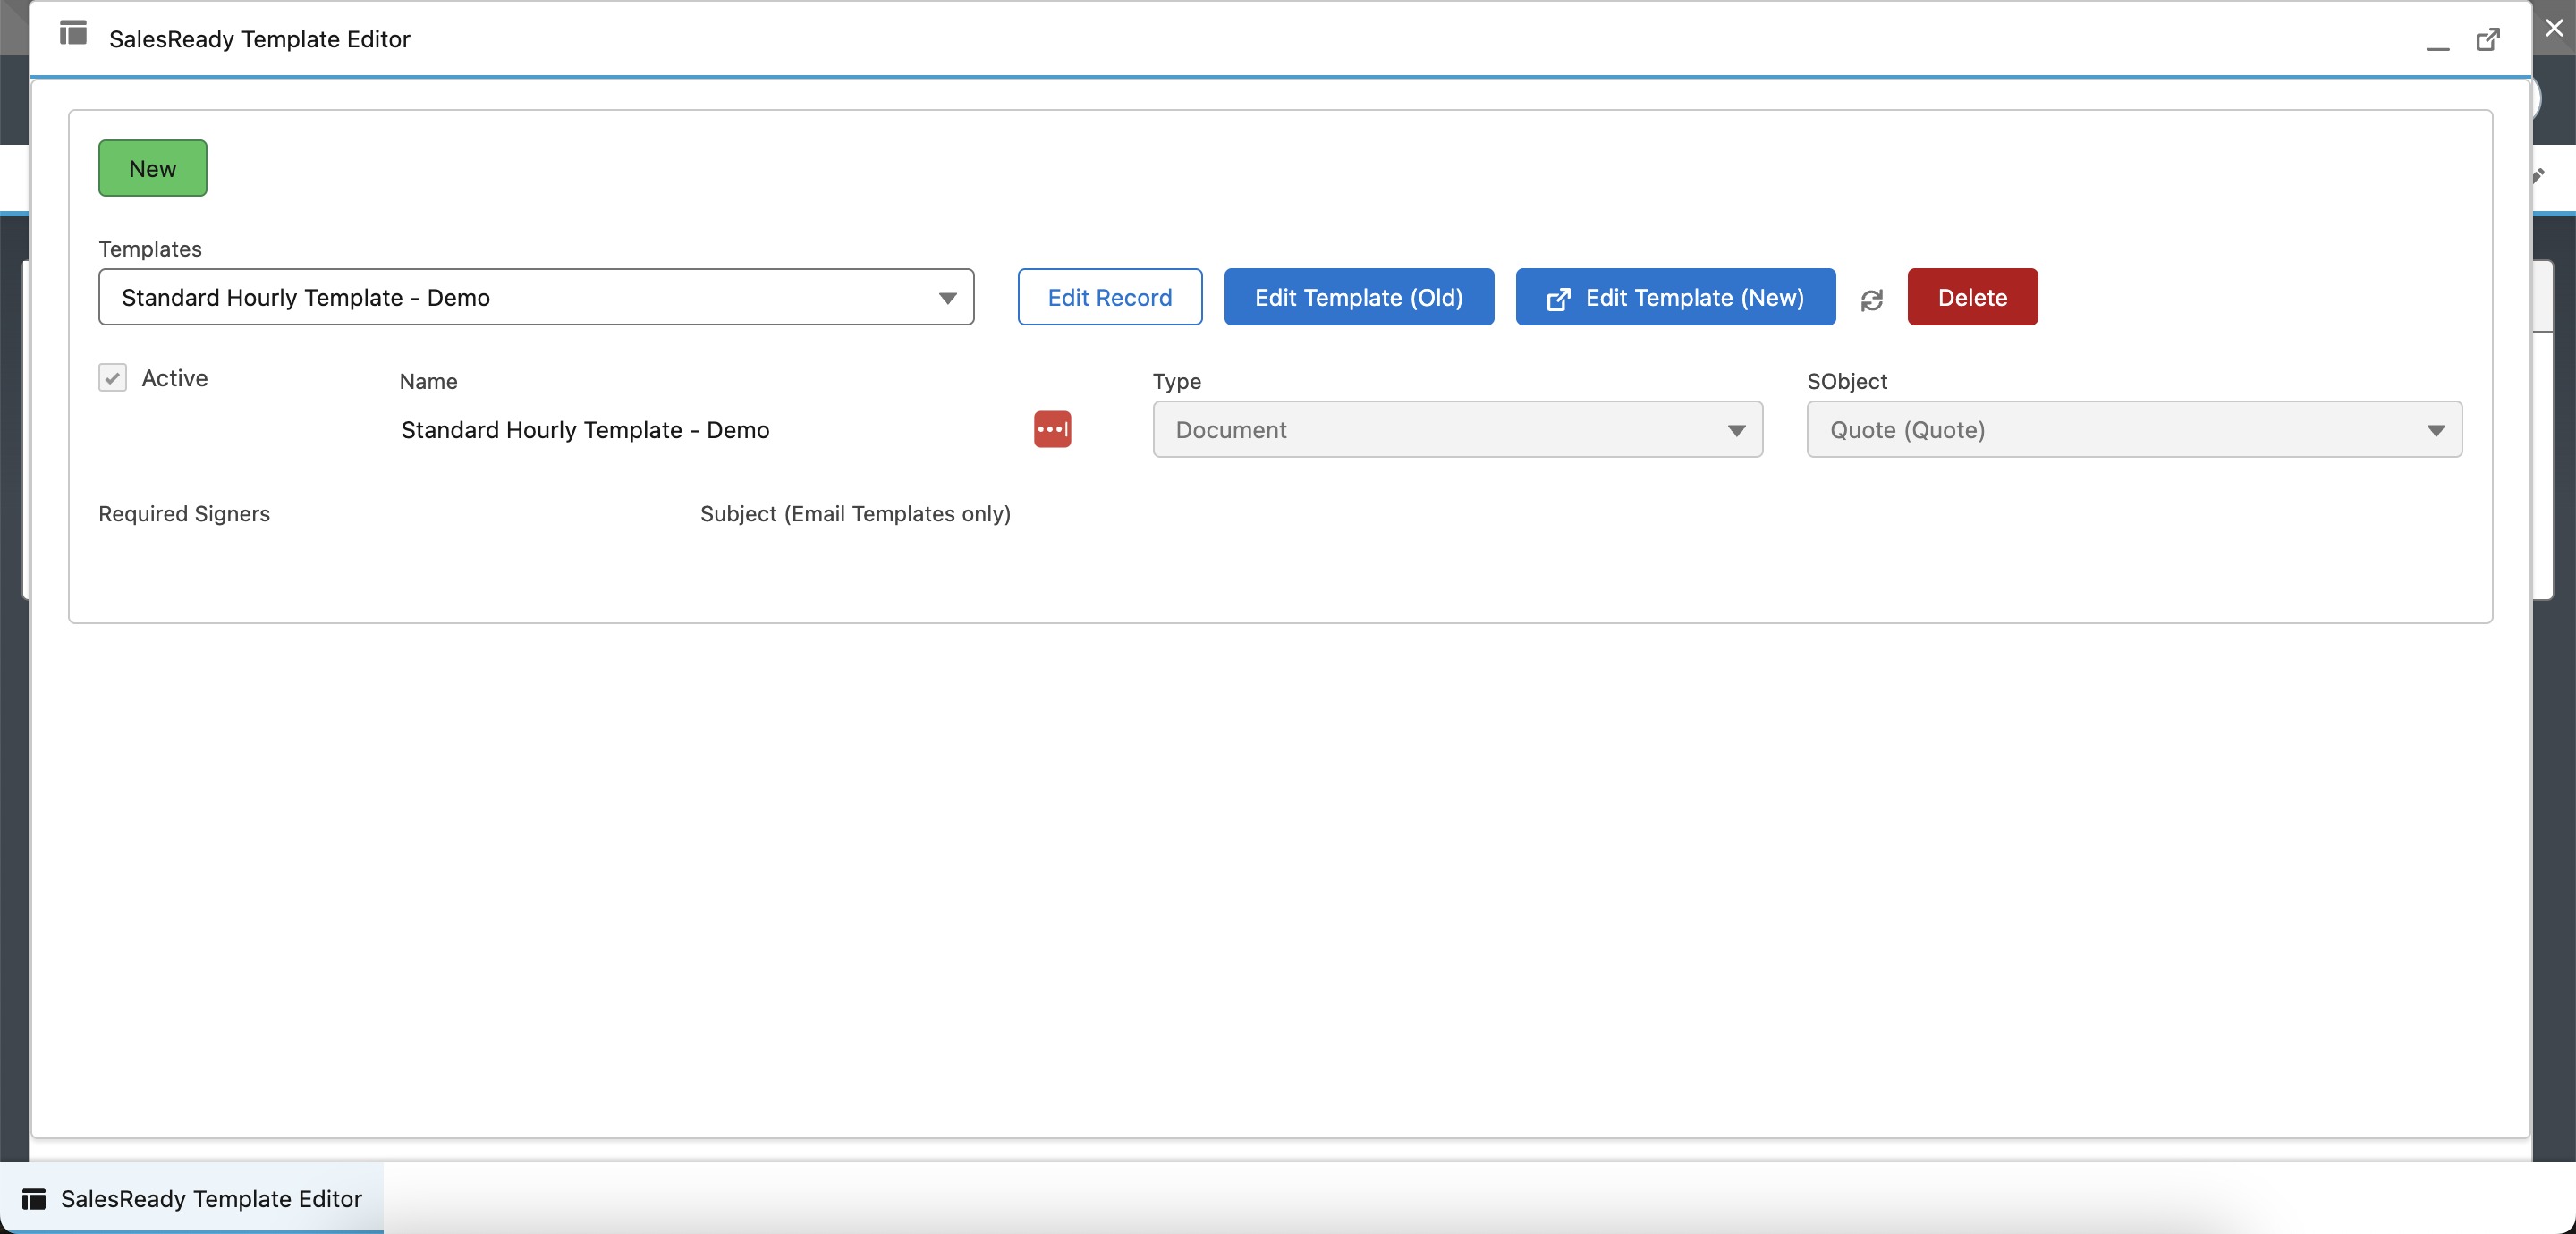
Edit Record allows you to edit the same fields above.
-
Edit Template (Old) should not be used unless you are modifying an old template.
-
Edit Template (New) is the correct way to access and edit the template.
-
This will take you to a new tab in your browser, and the domain will be https://app.salesready.io. Please ensure the correct browser settings are enabled for this domain.
-
-
The refresh icon needs to be clicked after updating and saving the actual template within the template editor domain.
-
-
Edit the template.
-
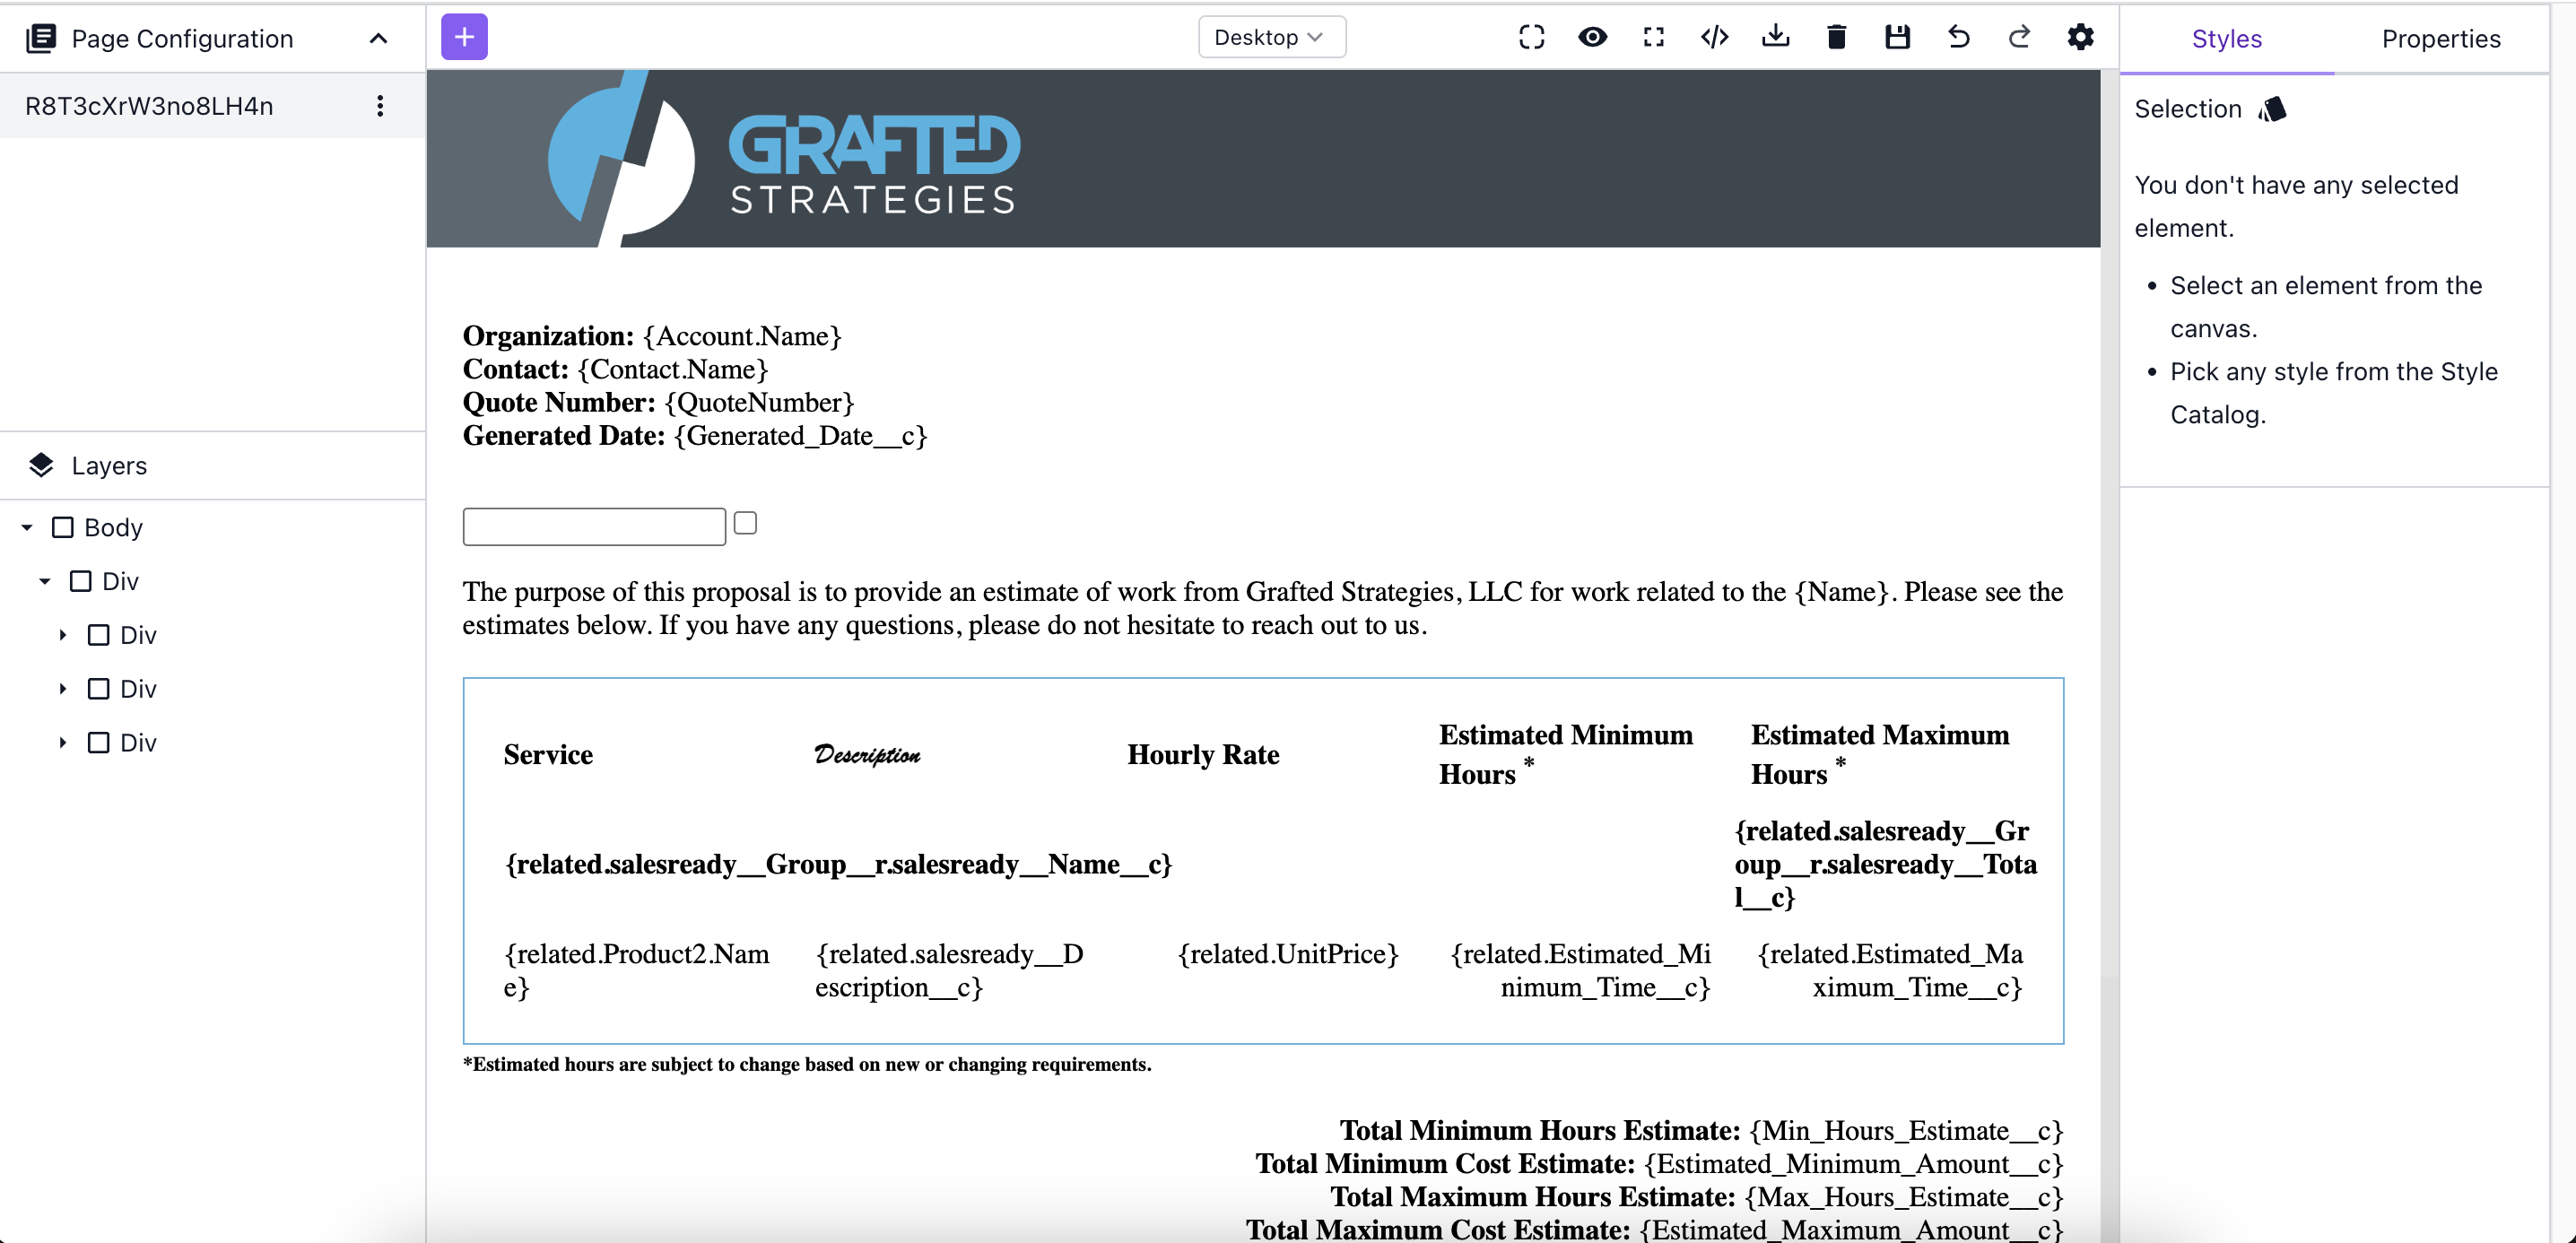
Merge field syntax is identical to how you would create a formula field. Using the example below that is tied to the Quote object, here are some merge field examples:
-
{Account.Name}- This will pull the Account Name for the Quote. -
{QuoteNumber}- This will pull the Quote Number for the Quote. -
{Generated_Date__c}- This will pull a custom formula field that usesTODAY().
-
-
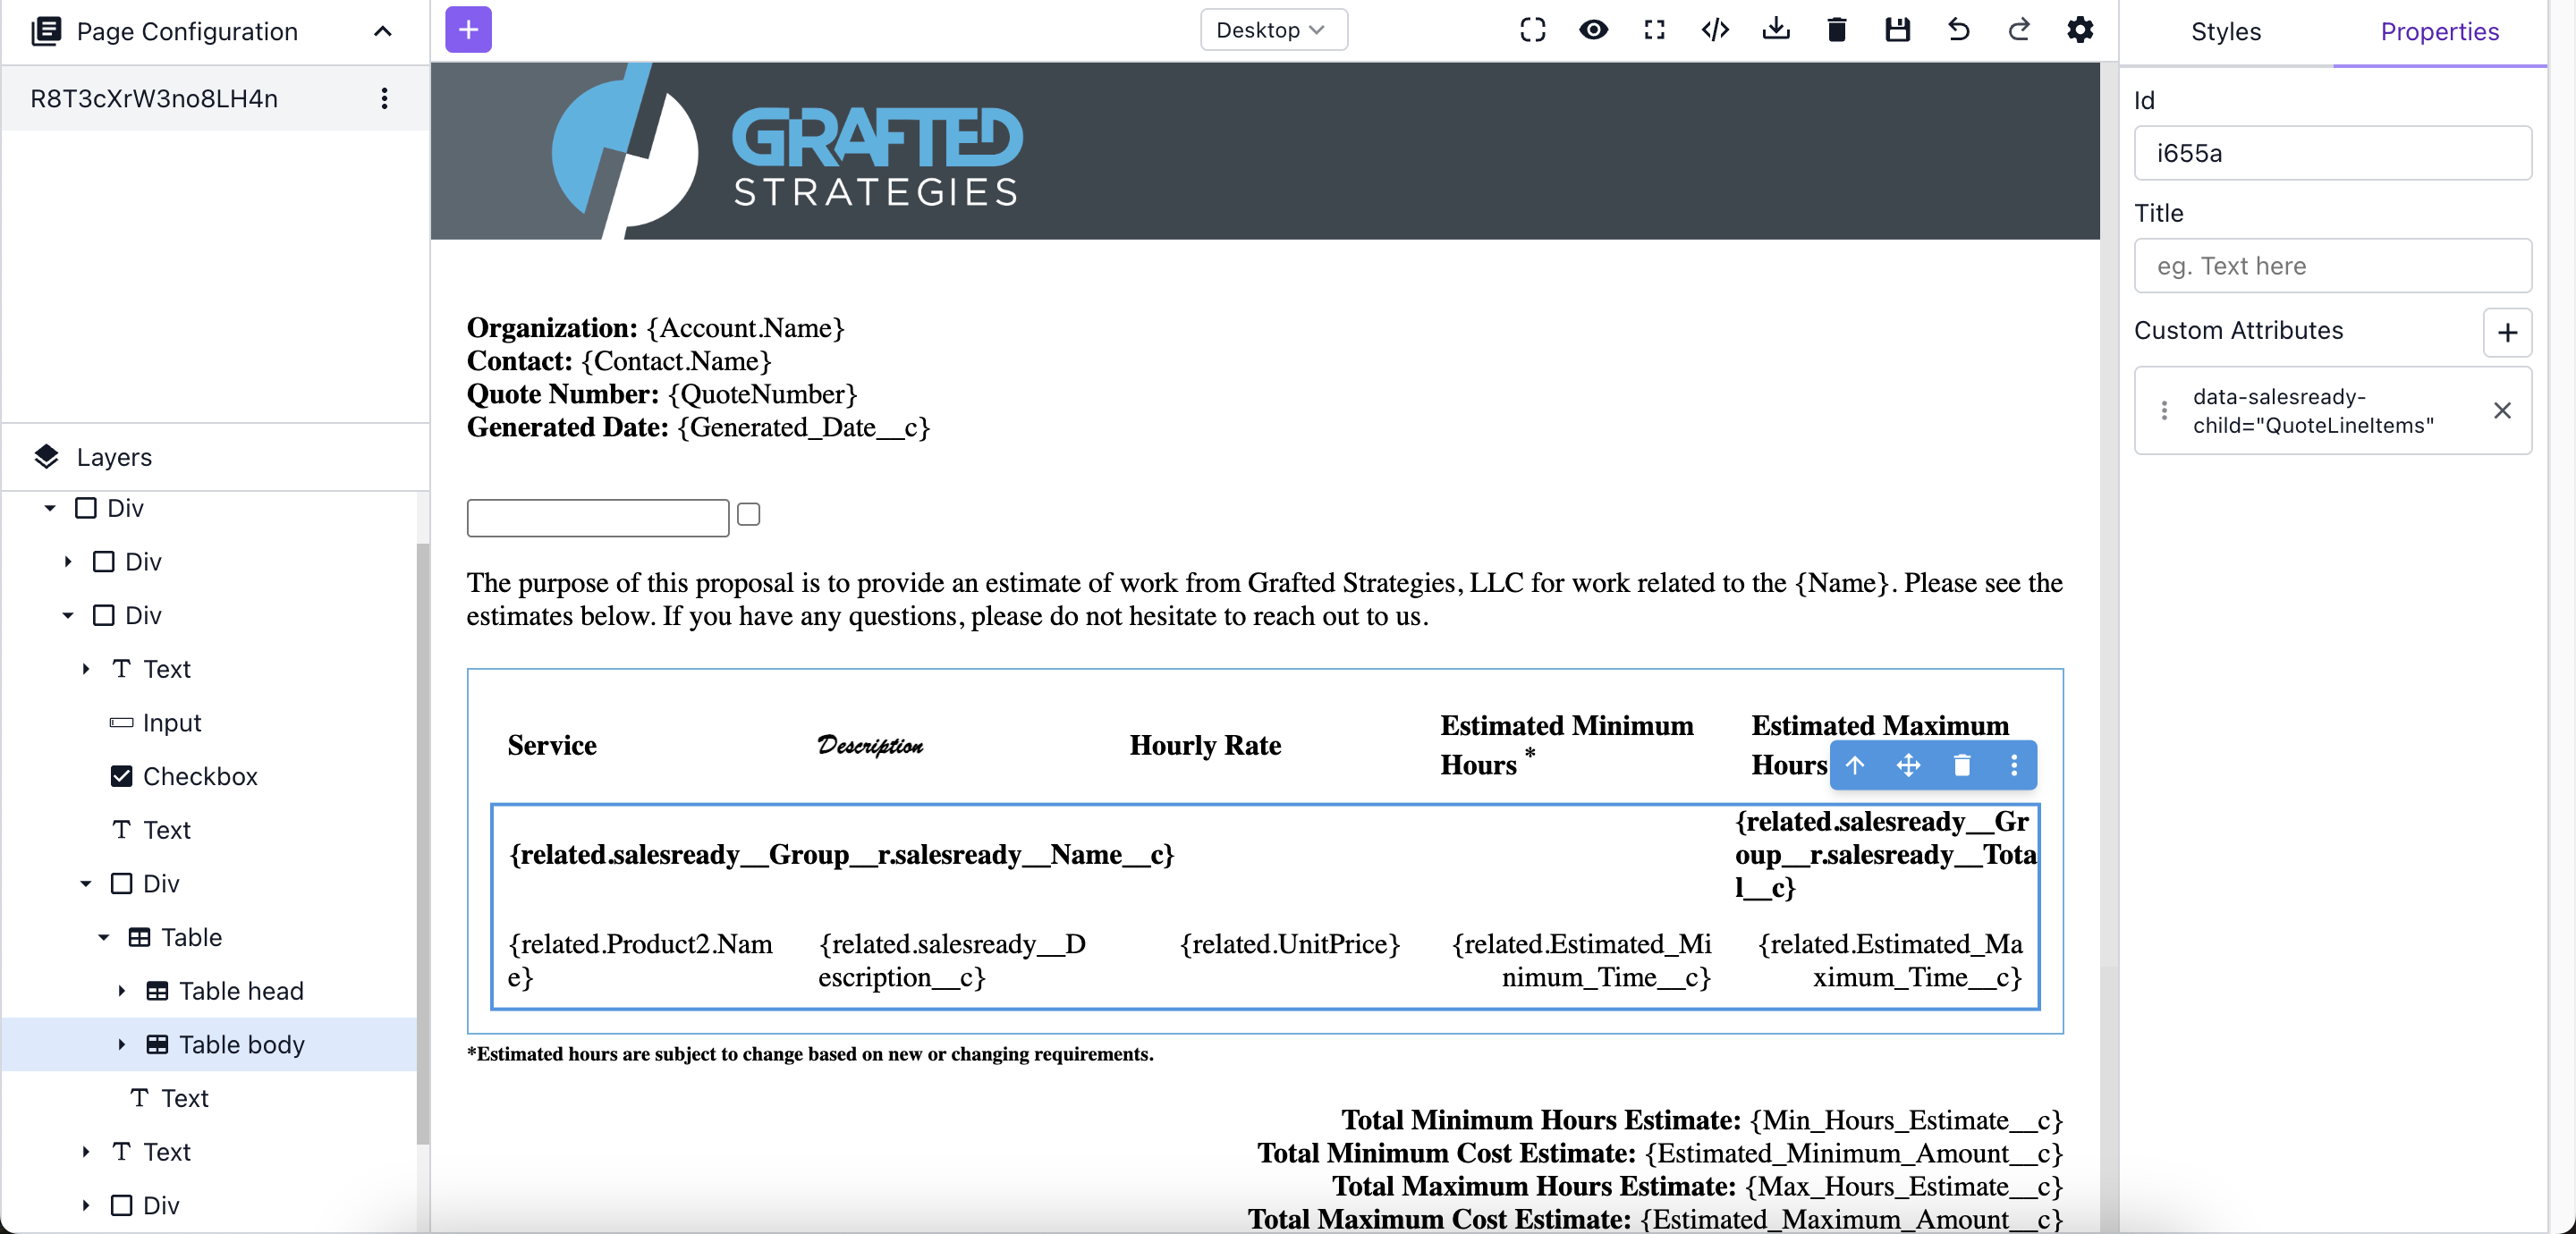
Since child records have a dynamic number of records, please see the second screenshot below for an example configuration:
-
Click the + button at the top left to open the block panel.
-
Drag the Table component onto the page.
-
Select the Table Body element.
-
Open the Properties at the top right.
-
Create a Custom Attribute with the following:
-
Name is
data-salesready-child. -
Value is the child relationship name. In this case it is
QuoteLineItems.
-
-
-
There is no need to write any queries for this data. SalesReady automatically queries the data for you.
-
-
Enable E-Signature (if applicable)
-
All that is needed to allow the signer to sign the document is to use the signer merge tag
{signer_ORDER_NUMBER}starting with #1 as the first signer.
-

IMPORTANT
Don’t forget to go back and click the refresh icon so that the template is up to date in Salesforce!