SalesReady E-Signature is built on an external web application hosted on Azure App Service. The template you create using your template editor is embedded in our web app, and sent to signers or recipients from Salesforce via unique links.
Here are the steps for sending for signature:
-
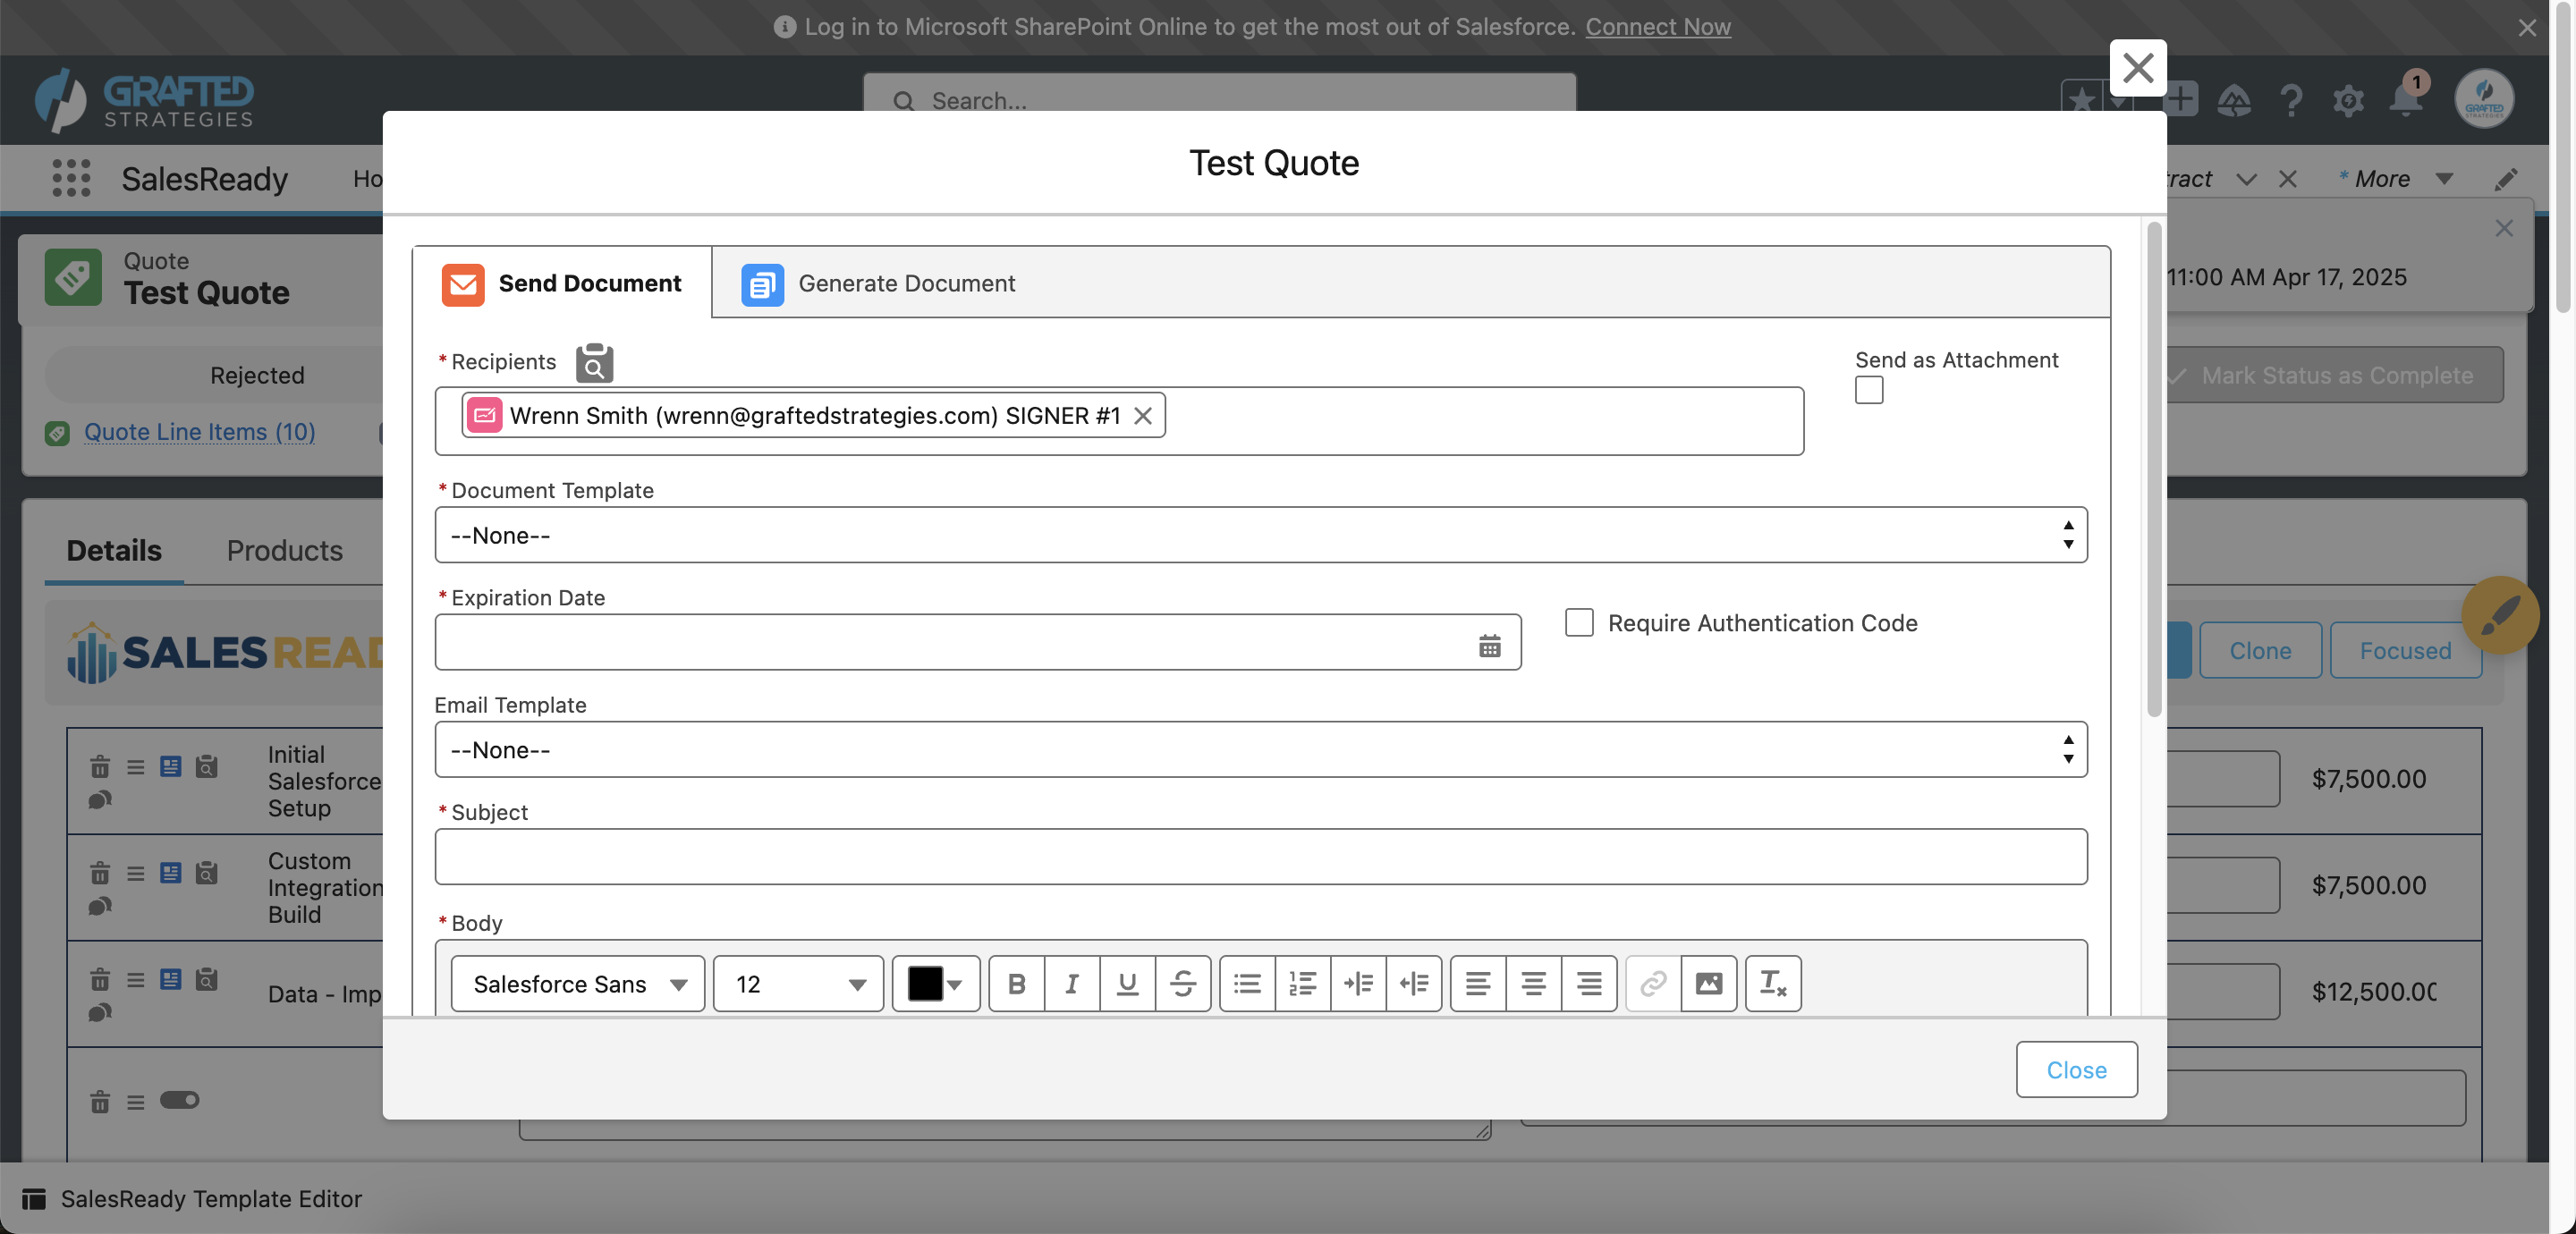
Open the universal transaction container from the quote builder or quick action.
-
Send Document is how you send for signature. It generates the document and then sends automatically.
-
Generate Document is how you simply generate and save the file to Salesforce.
-
salesready__UUID__c will get set on the ContentVersion object for any documents generated via this tab.
-
-
Click the
Lookupicon to search for Contacts or Users in Salesforce. Each recipient can be added as a Signer or Viewer.-
Signers are required to sign in order for the transaction to be marked as completed.
-
Viewers can only access and download the document when received.
-
-
Document Template is where you select the templates you created for that specific object.
-
Expiration Date is required when sending for E-Signature.
-
Require Authentication Code sends a second email to authenticate that the email address is correct once they try to open the document.
-
You can use a pre-built email template or add the Subject and Body yourself.
-
The merge tag
{link}must be somewhere in the body of the email. You will notice an error if trying to send without it. This replaces the link with the link generated by SalesReady for each recipient.
-
-
Each user will get their own unique link, which means every recipient gets their own email.
-

