Always sync the changes in Salesforce after modifying the template.
SalesReady templates are documents that you can create either as static files (PDF, Word, PowerPoint) or documents sent for eSignature. When creating and/or modifying a template, a session gets created from Salesforce where admins can build templates in a browser connected to your web app. The templates get stored in SalesReady, as well as in Salesforce upon syncing.
Create documents from any object in Salesforce
-
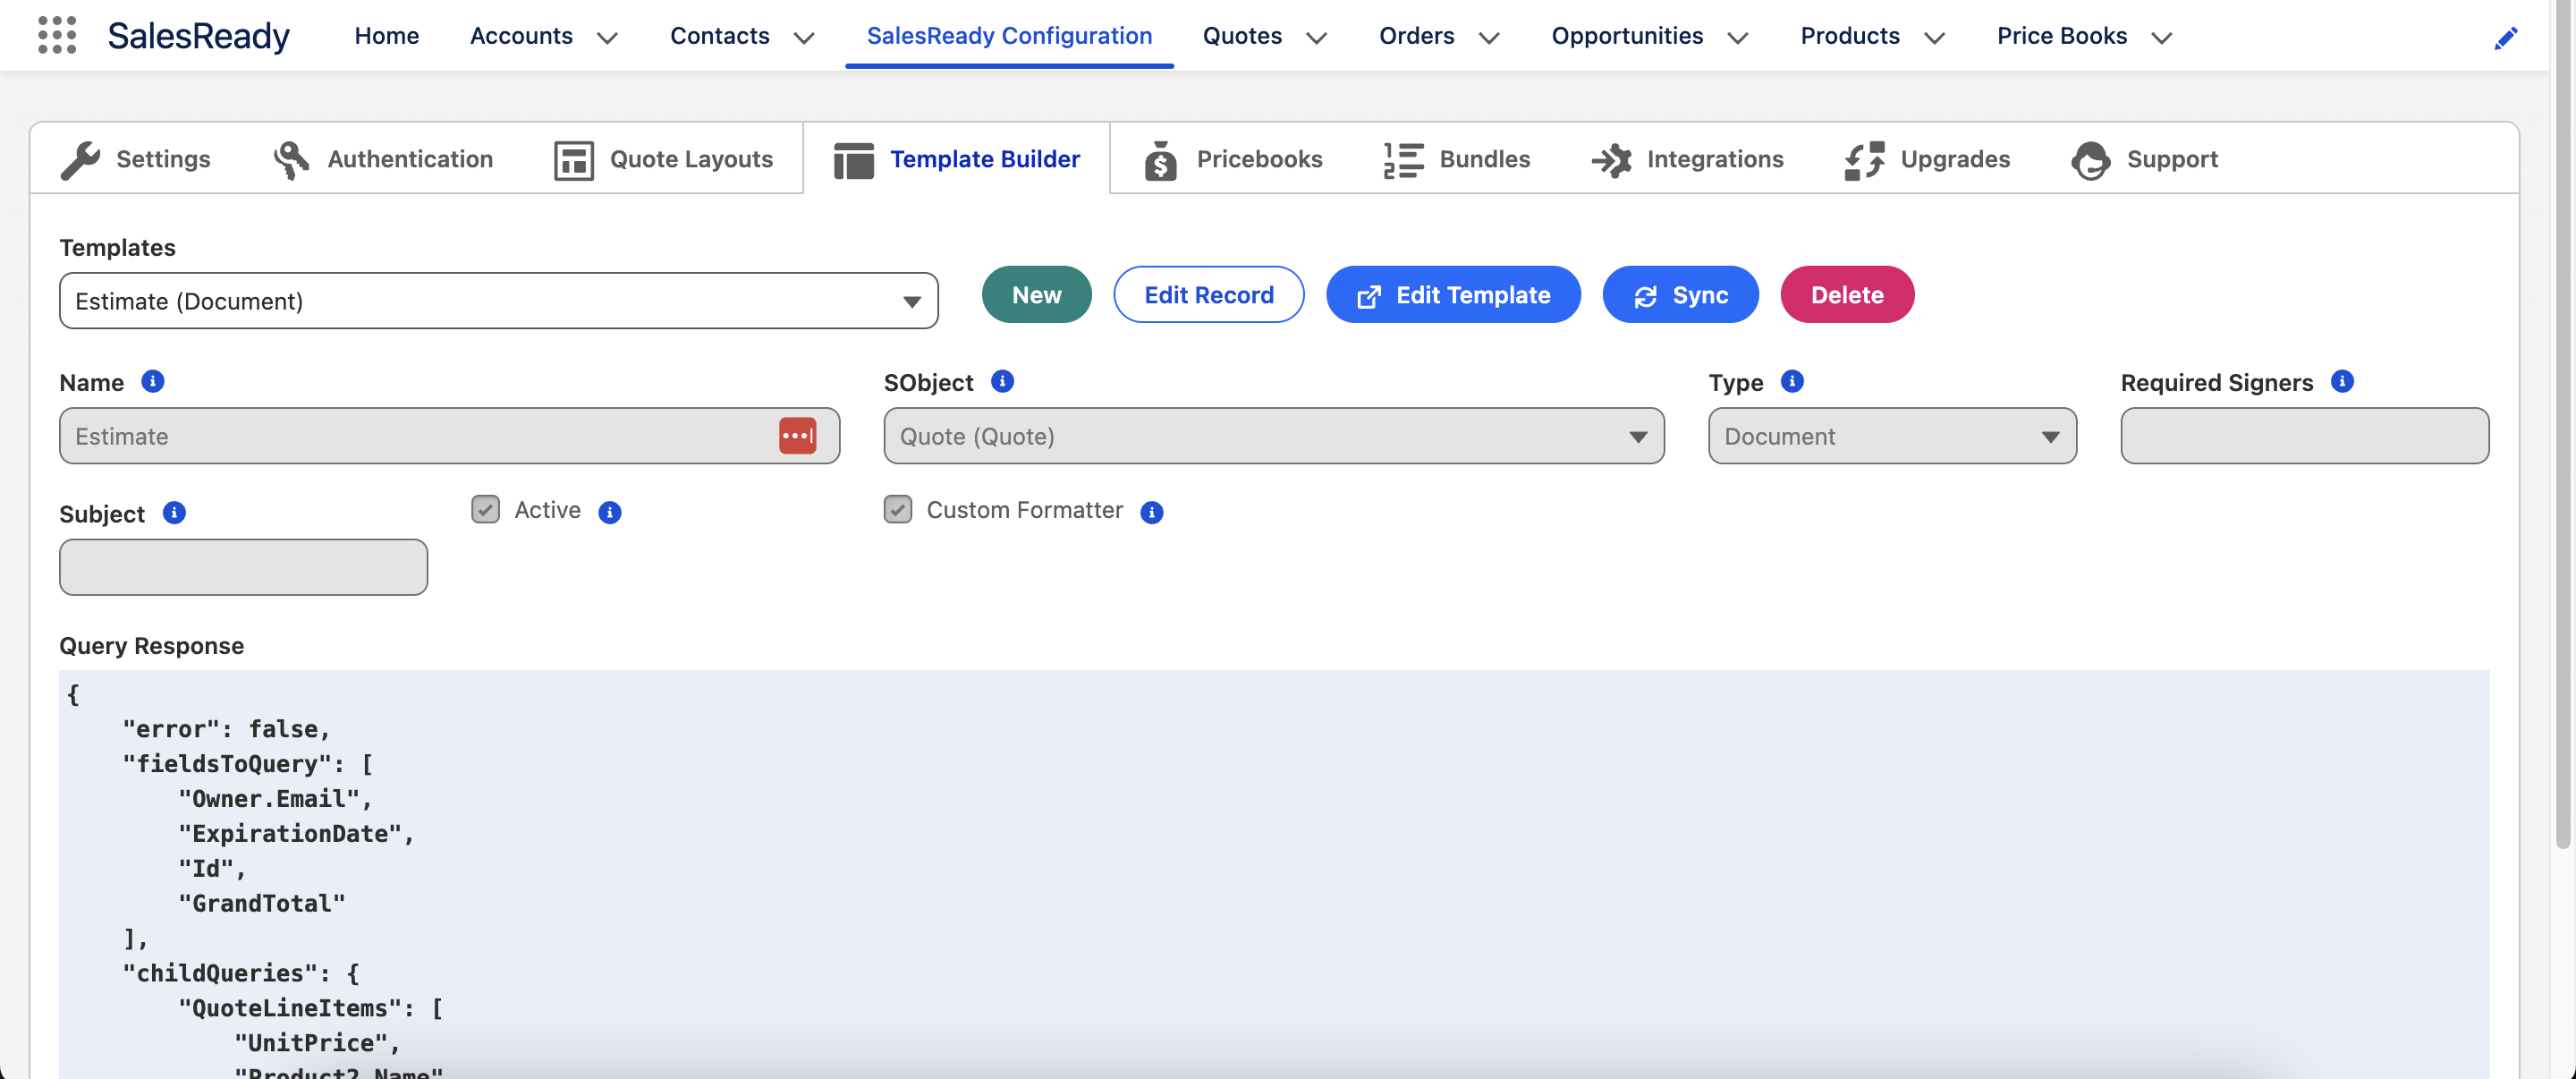
Name - The name of the template for end-users.
-
SObject - The object where the template can be used, whether via the quote builder or a quick action.
-
Type -
DocumentorEmail. -
Required Signers - The number of required signers if a Document type and sending for eSignature.
-
Subject - The email subject if an Email type.
-
Active - Available to be used by end-users or automated processes.
-
Custom Formatter - Based on the Type:
-
If Document check this box for any new template moving forward unless recommended not to by SalesReady support.
-
If Email it is best to leave unchecked.
-
Build your template
-
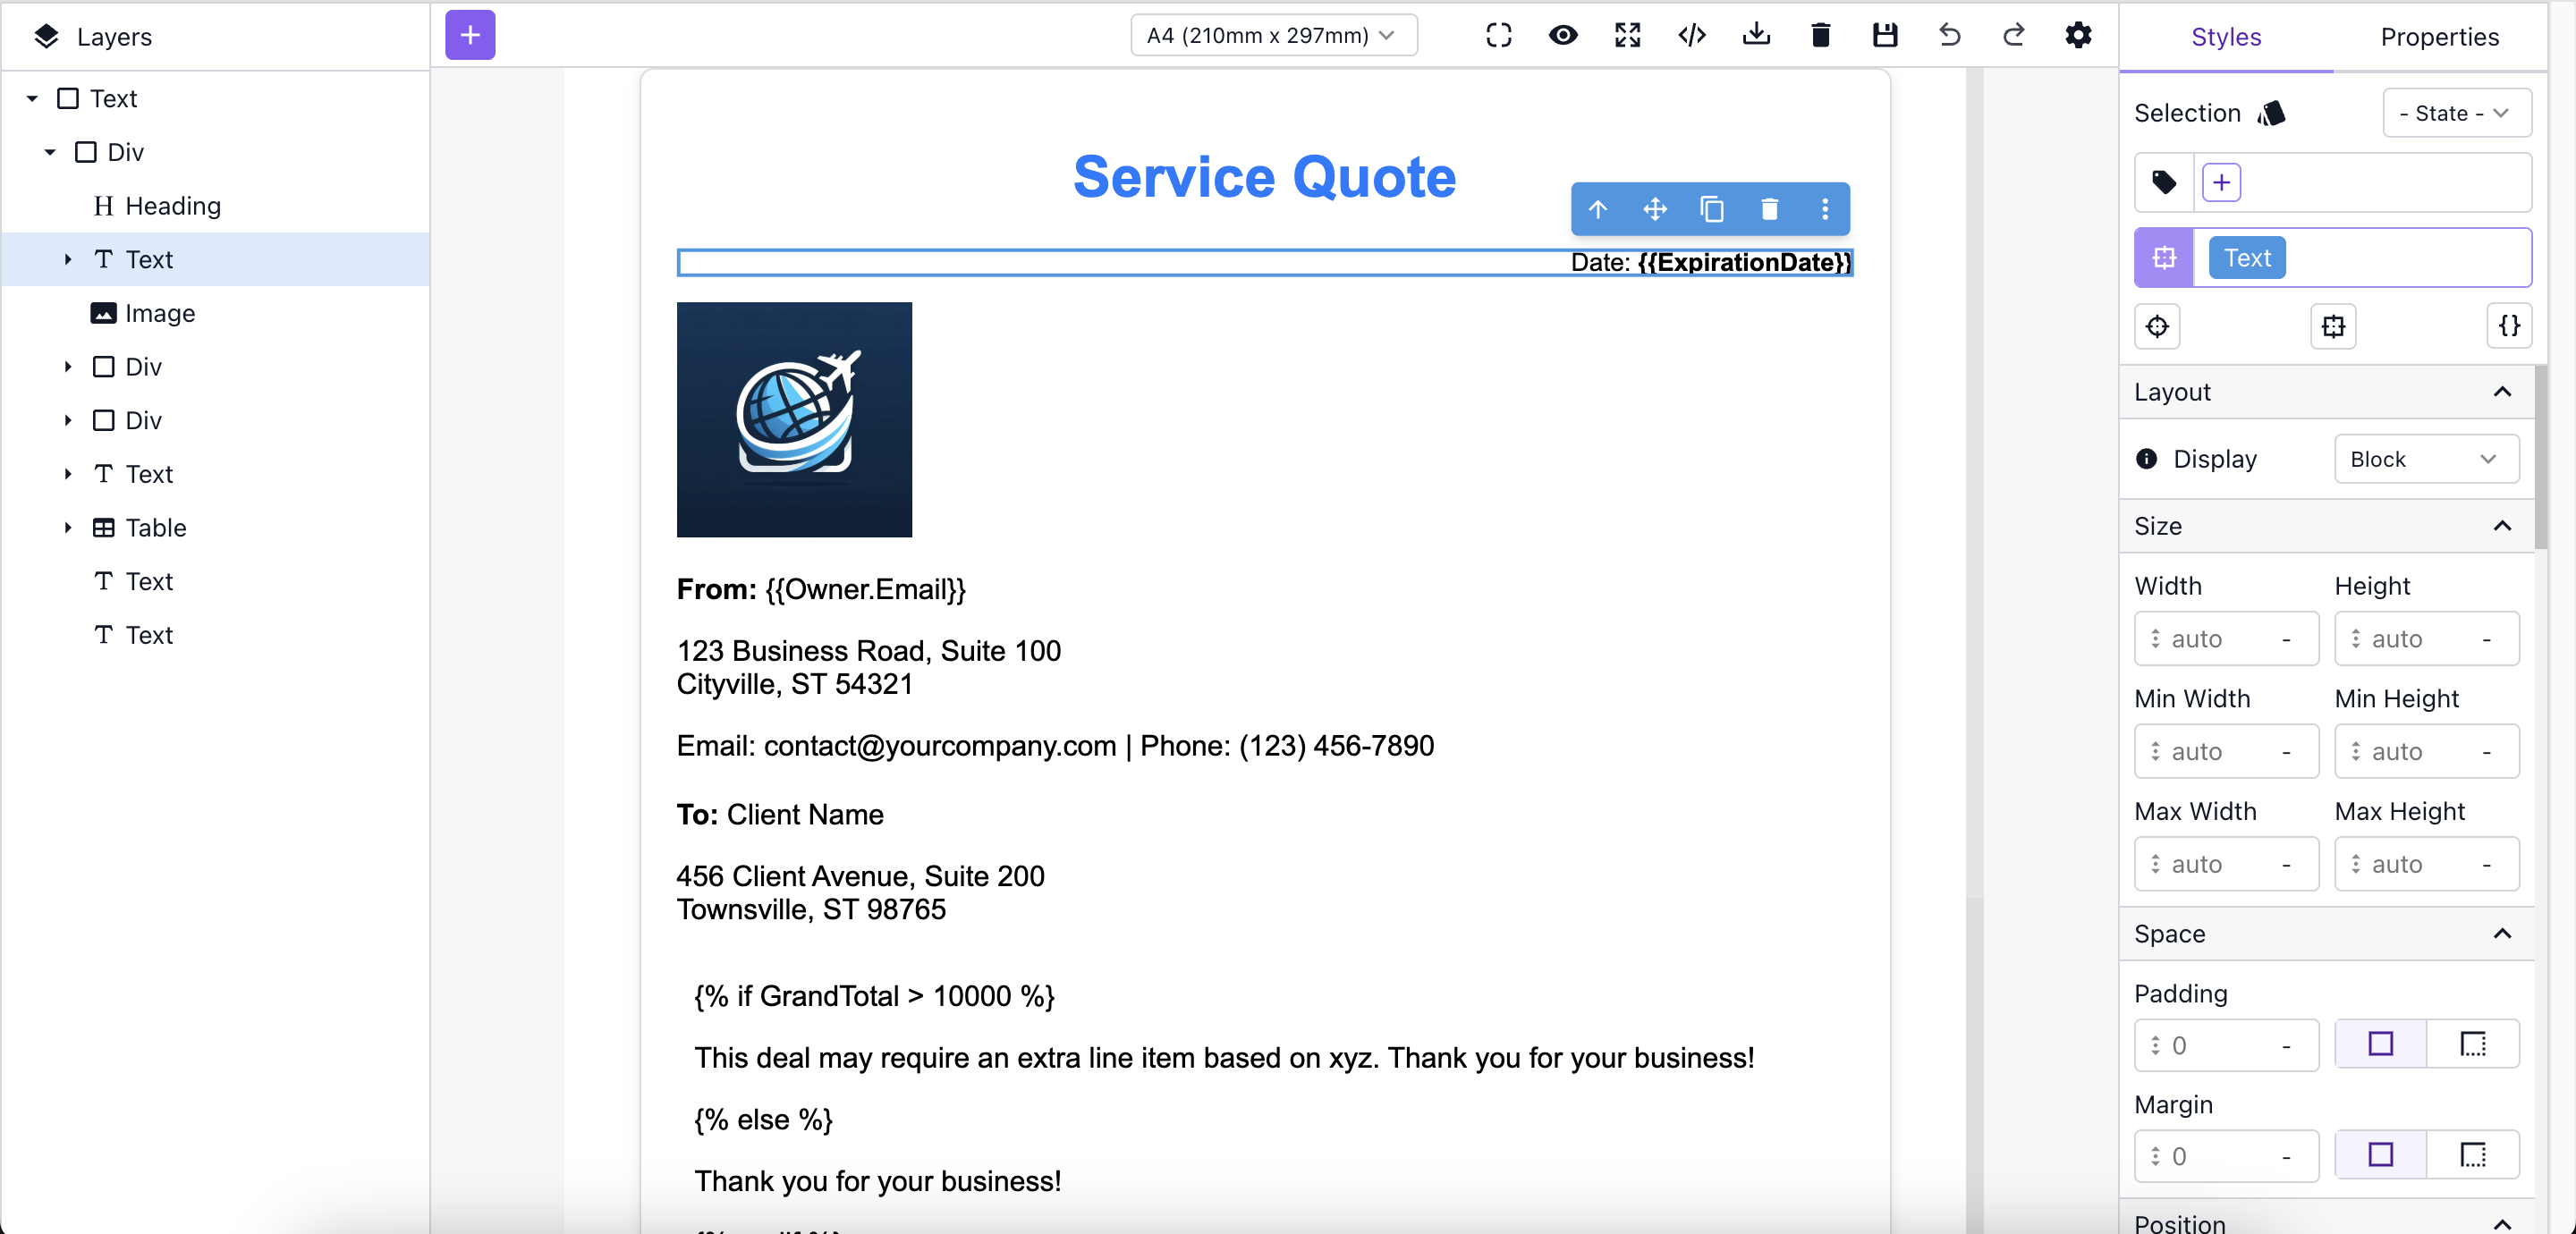
When clicking Edit Template a browser session will open and you can start to build the template.
-
Blocks are displayed on the left hand side when clicking the + button. They include;
-
Multi column layouts, which are great for headers or areas with more than one column.
-
Sections, which are great for managing various sections throughout the document.
-
Headings, which are great for larger text items.
-
Text, which you’ll need for static or dynamic text.
-
Images, which loads the asset manager for you to upload images or import from a URL.
-
Image Box, which allows for adding text over an image.
-
Icons, which gives you access to a wide range of icons.
-
Tables, which are great for related data or more uniform content.
-
Form inputs, which are needed for capturing additional information when sending for signature.
-
Custom Code, which is great for users who want to embed their own HTML or CSS.
-
Page Breaks, which are needed for directing the document to break when applicable.
-
Headers and Footers, which are needed when the document gets converted to PDF and those are required.
-
-
Automatic Merge Fields (no queries or reports required)
-
The merge syntax for regular fields is {{
field_api_name}}. You can access parent fields just like you would do in a formula field. -
The merge syntax for child fields is {{
related.field_api_name}}.-
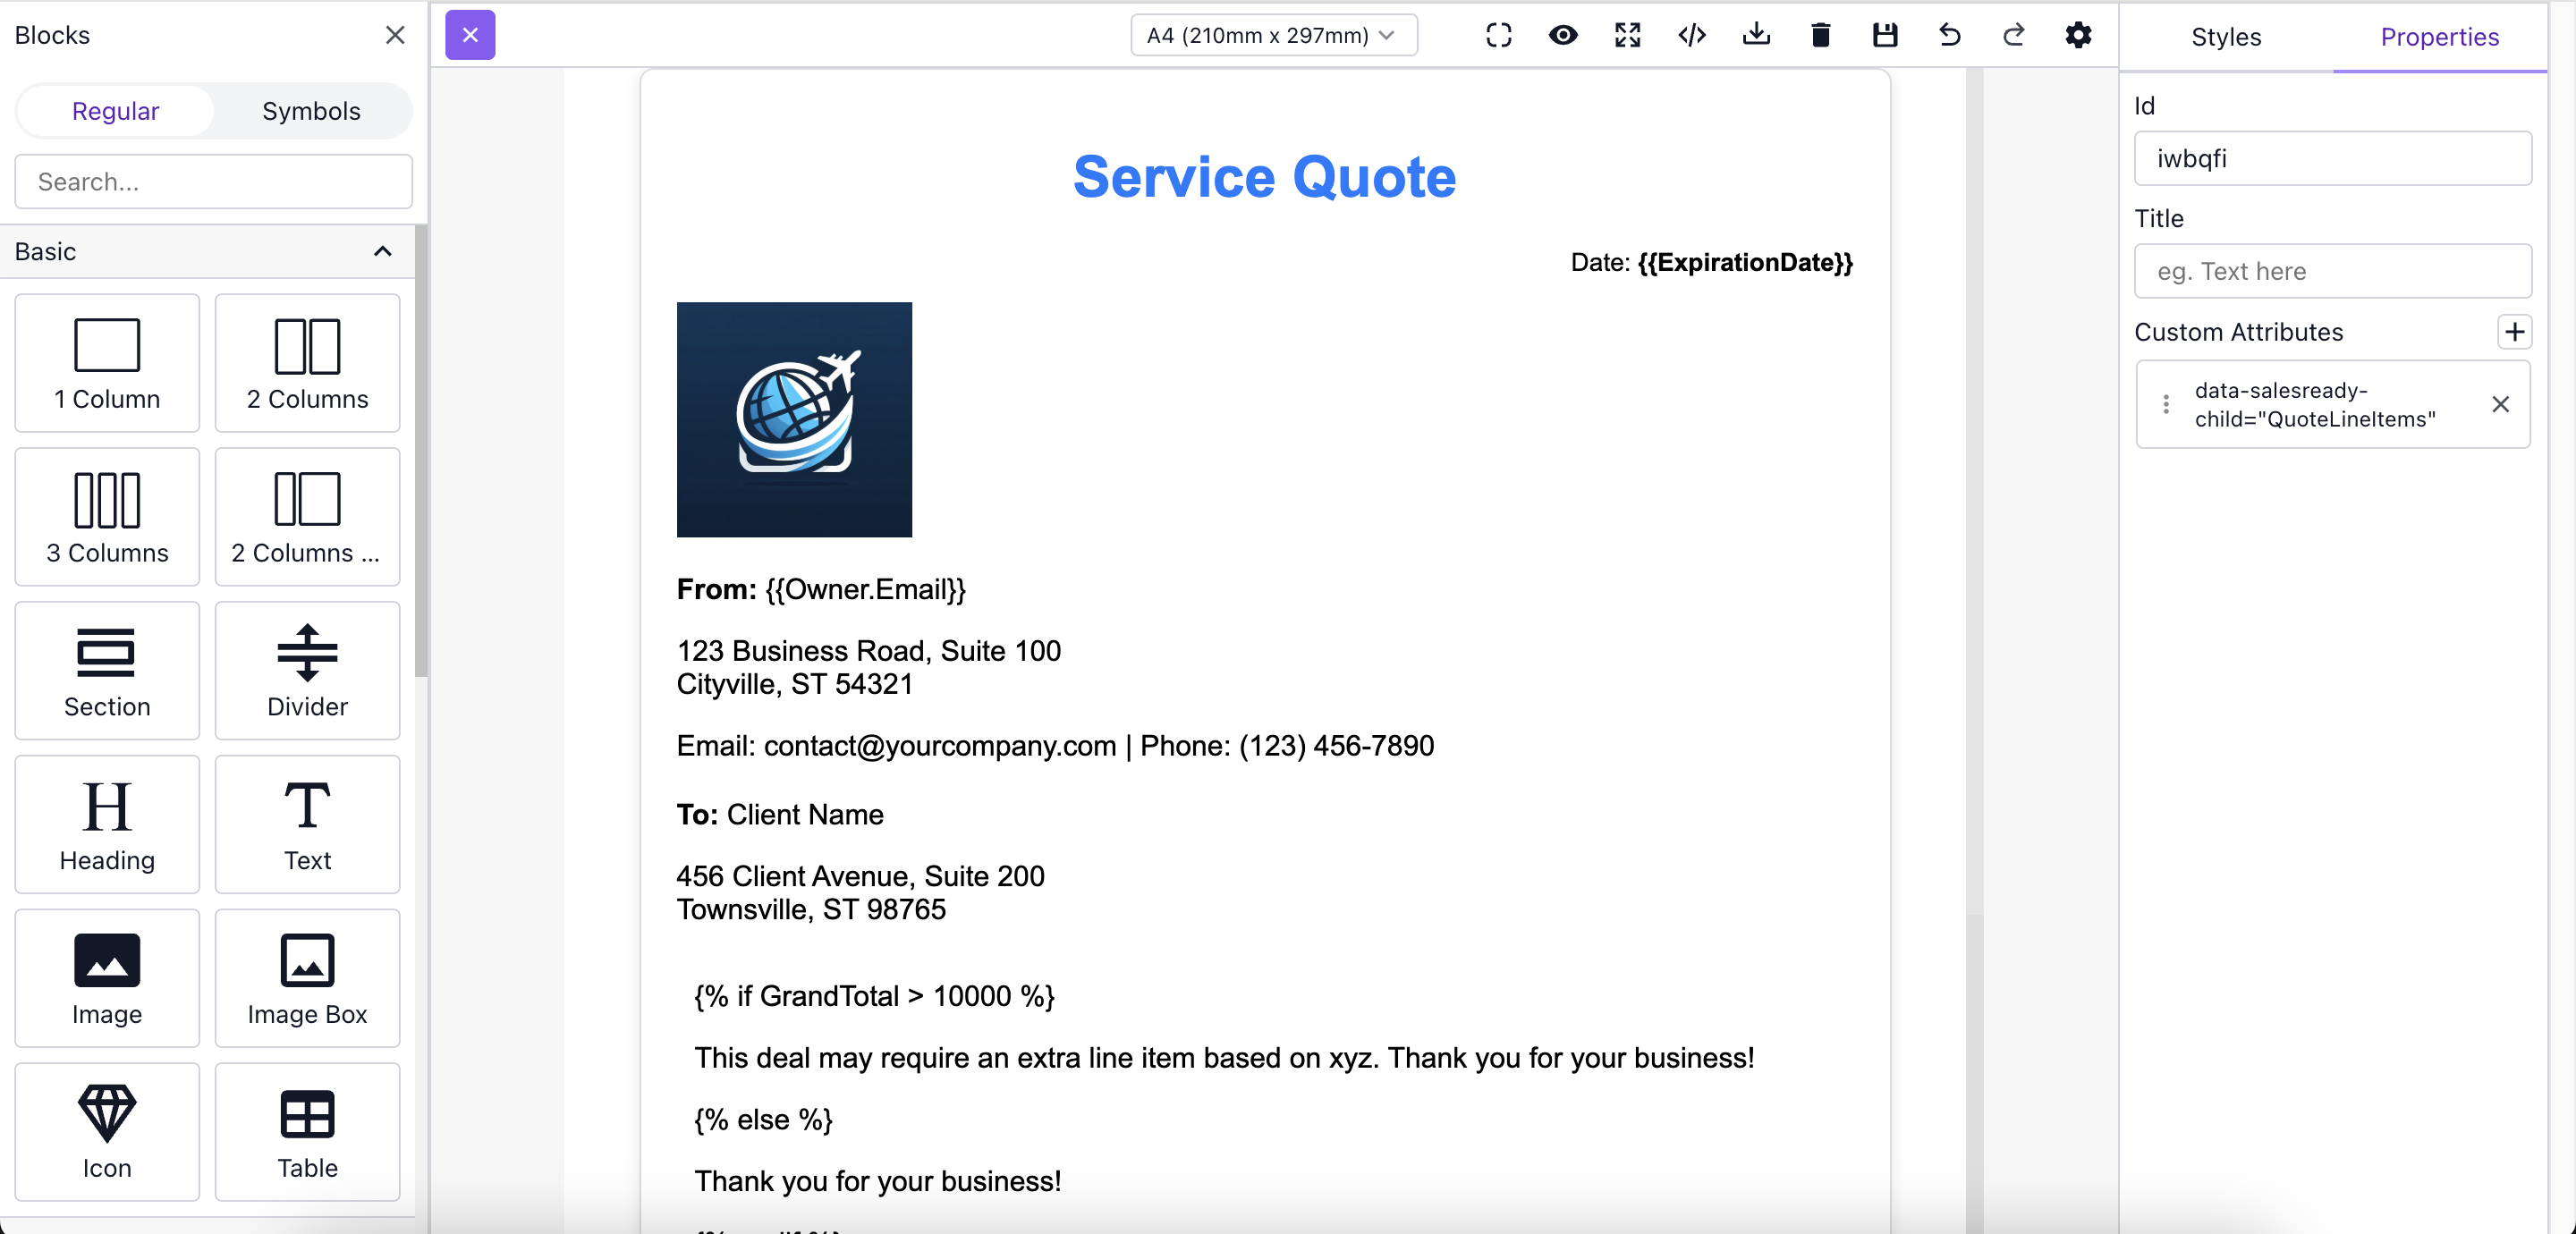
Since child records have a dynamic number of records, please see the second screenshot below for an example configuration:
-
Click the + button at the top left to open the block panel.
-
Drag the Table component onto the page.
-
Select the Table Body element.
-
Open the Properties at the top right.
-
Create a Custom Attribute with the following:
-
Name is
data-salesready-child. -
Value is the child relationship name. In this case it is
QuoteLineItems.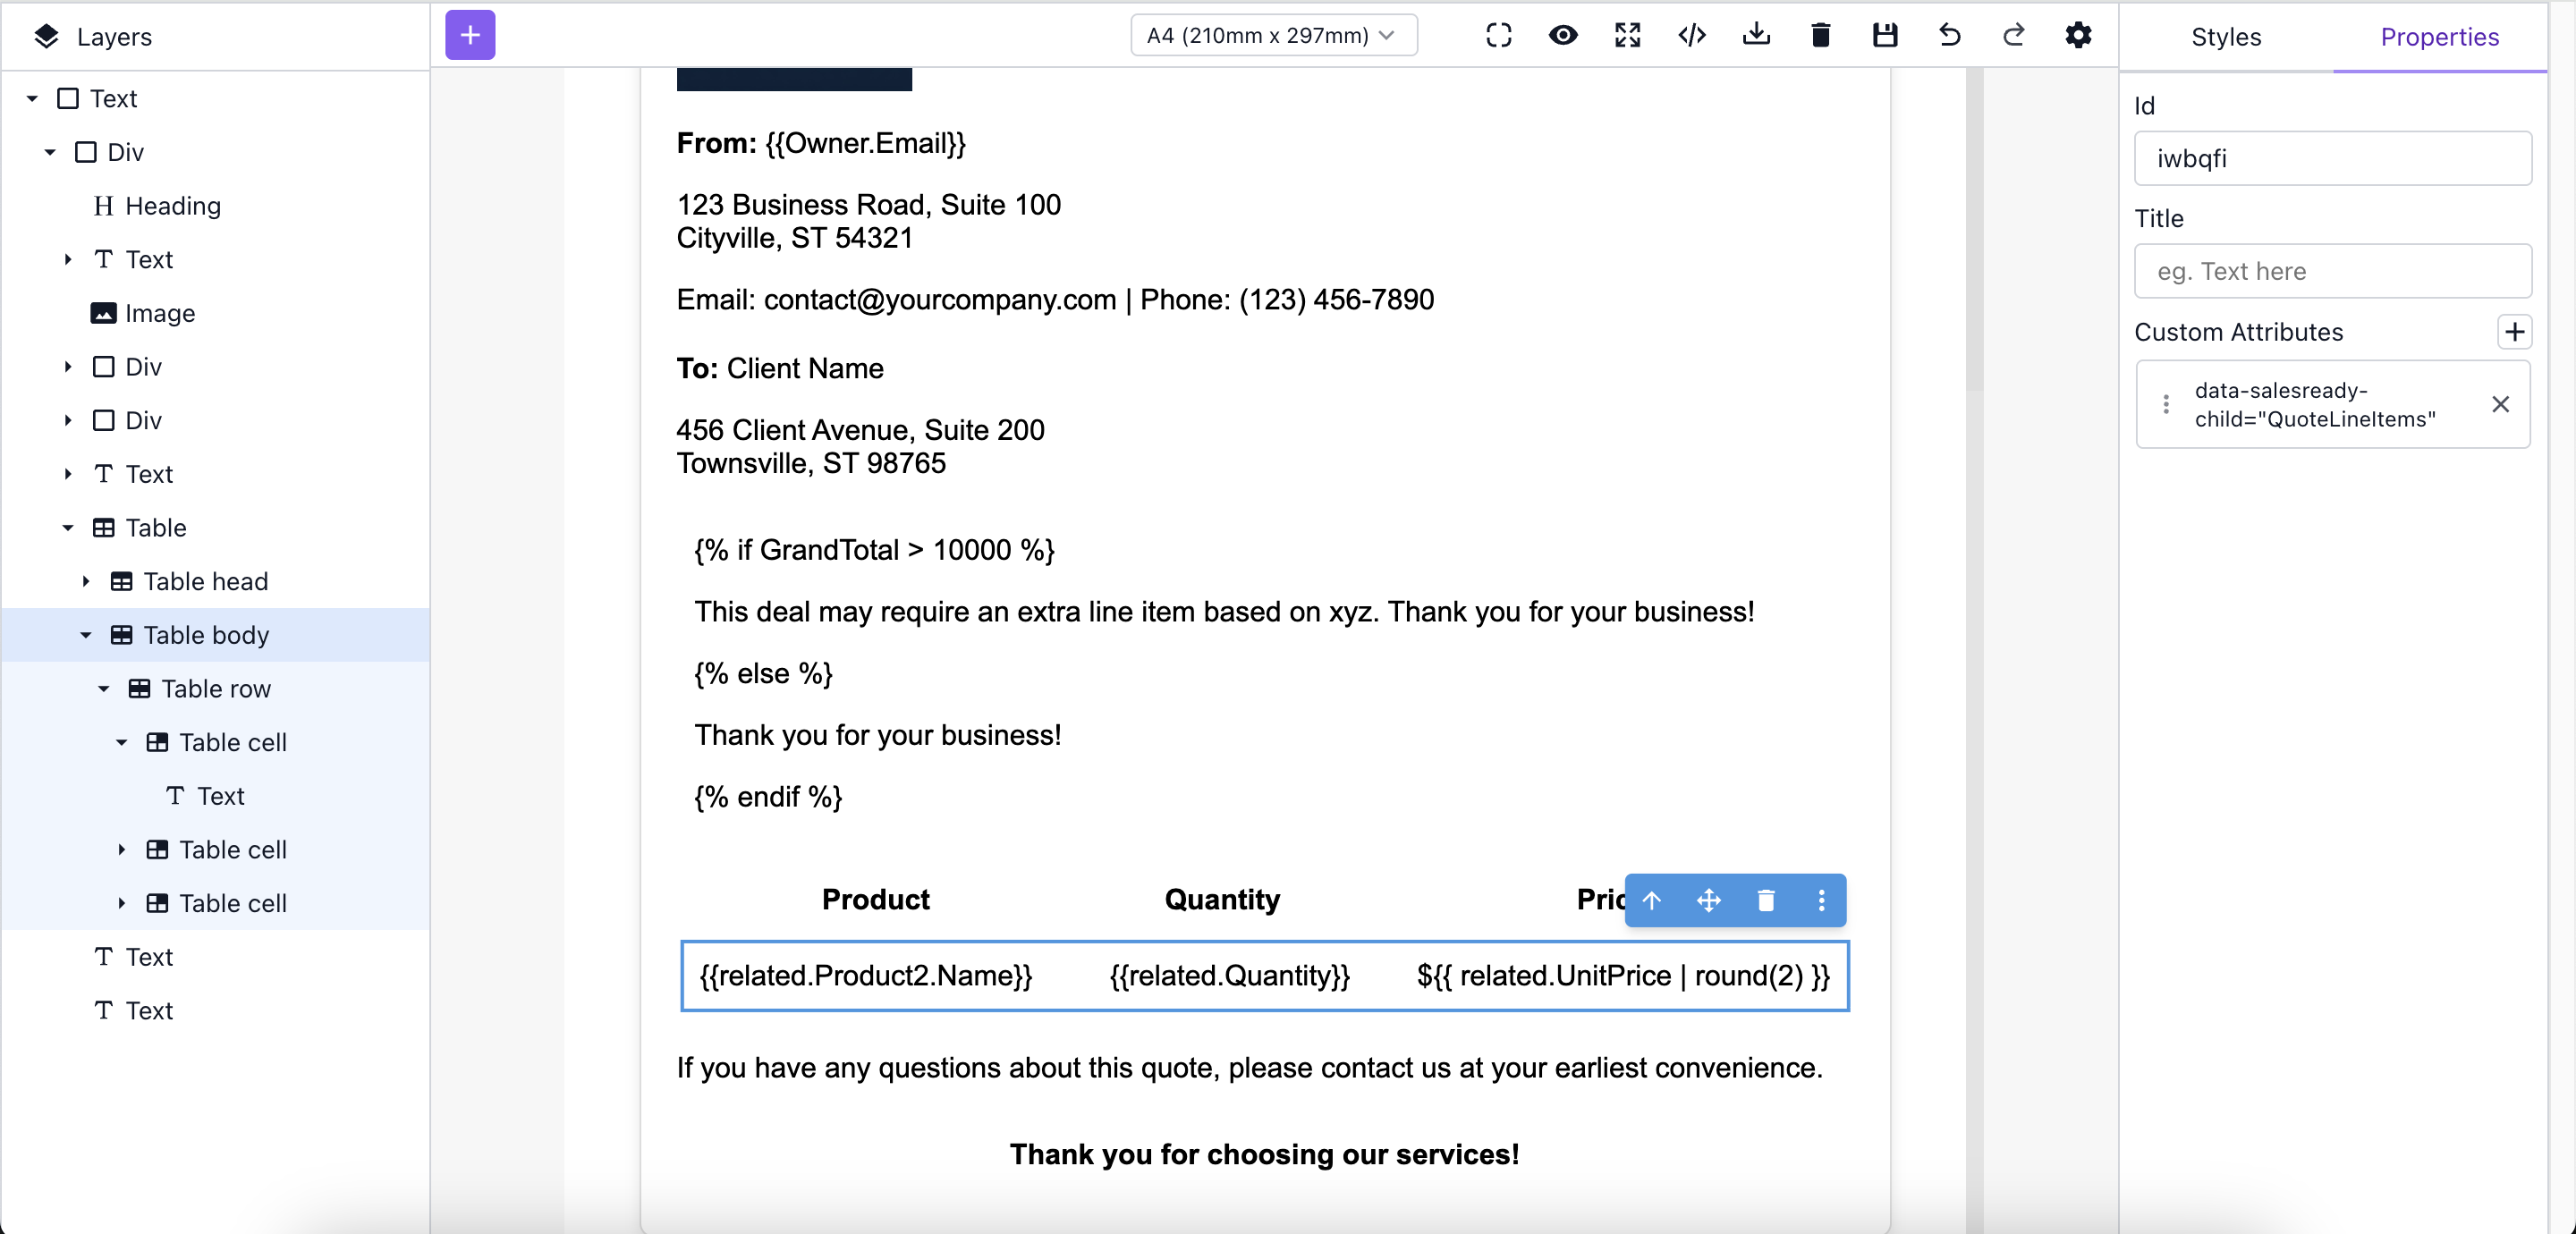
-
-
-
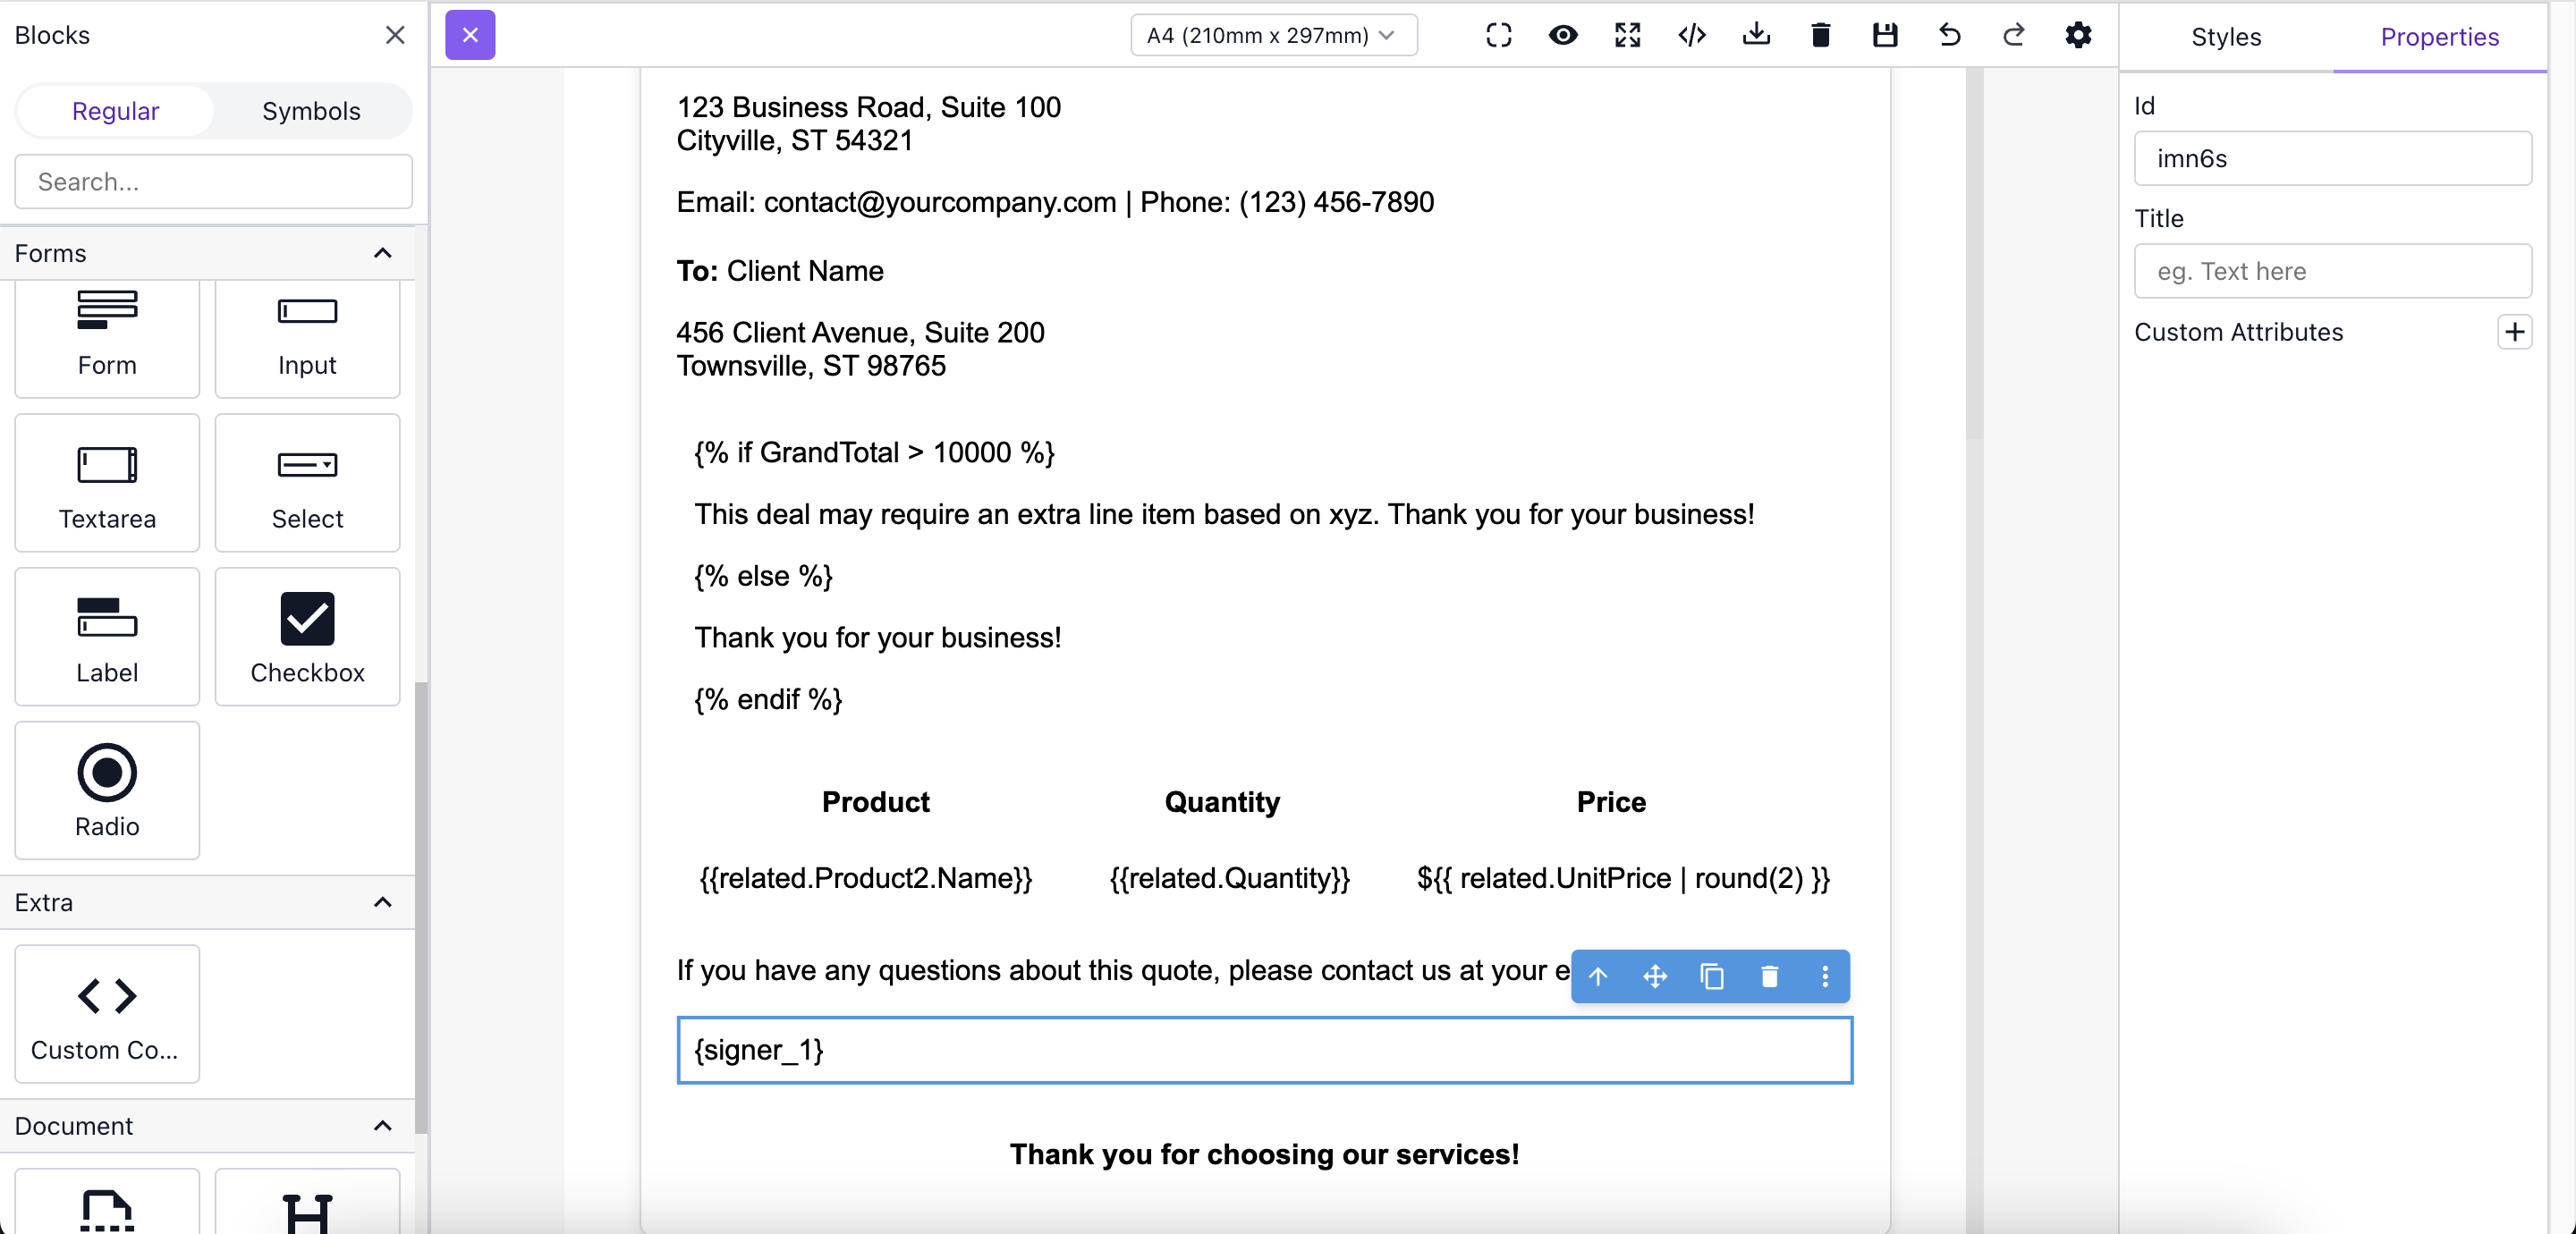
Add eSignature tags
When needing a valid and compliant eSignature within the document (not just collecting information) do the following:
-
Drag a Text block onto your template.
-
Use {
signer_ORDER_NUMBER}. For example,{signer_1}.